After emergency treatment, proper aftercare for dental trauma is just as crucial as the initial care you received. By following expert guidance on healing, maintenance and monitoring, you reduce pain, support tissue repair and prevent long-term complications. Whether you’ve had a tooth knocked out, fractured or splinted, this article walks you through every step you need to protect your smile.
Understand your aftercare role
Your active involvement drives a smooth recovery. The emergency room often addresses immediate threats—bleeding, severe pain and infection risk—but lasting healing depends on what you do next. Think of aftercare as a bridge between acute treatment and full restoration.
During the first days, your body lays down blood clots and new tissue. Disturbing that process can lead to dry sockets, infection or delayed bone and gum repair. Knowing why each step matters makes you more likely to stick with recommended routines.
You may feel tempted to return to normal chewing, brushing and sports right away. Resist that urge. Every action you take—what you eat, how you clean, when you rest—affects the quality of your recovery.
Follow immediate first aid
After leaving the clinic, keep treating your injury gently. These steps protect any splints, blood clots or temporary fillings placed by your doctor.
Handle knocked-out teeth
If a permanent tooth has been completely displaced, time is critical. Pick it up by the crown (the chewing surface) and avoid touching the root to preserve vital cells. If it’s dirty, rinse it gently with water—no soap or chemicals—then try to reinsert it in the socket immediately. If that isn’t possible, store it in milk, saliva or a tooth preservation kit until you reach your dentist [1].
Smooth fractured edges
Broken or chipped teeth often have sharp enamel shards that can cut your tongue or gums. Your doctor may smooth these edges or place a temporary filling, but permanent restoration requires follow-up with your regular dentist [2]. Avoid probing the area with your tongue or utensils.
Stabilize loose teeth
If a tooth remains in its socket but feels loose, it may be splinted for one to two weeks. This stabilizes the tooth while ligament fibers and bone heal around it. Do not chew directly on the splinted side until your dentist removes the brace [2].
Schedule follow-up appointments
Professional monitoring ensures that hidden issues don’t go untreated. Your emergency visit is only the first checkpoint.
Initial checkup
Within 24 to 48 hours, return for a post-emergency dental follow up appointment. Your dentist will examine swelling, bleeding and pain levels, adjust any splints or dressings, and reinforce your home-care plan [3].
Ongoing monitoring
Depending on your injury, expect checkups at one week, one month and possibly three or six months. Each visit evaluates soft tissue healing, bone integrity and gum health. X-rays or advanced imaging such as 3D scans may be used to assess pulp involvement or hidden fractures [4].
Specialist evaluation
If you have complex facial or jaw trauma, your dentist may refer you to an oral surgeon or endodontist. These specialists can perform root canal therapy, surgical repair or even bone grafting if needed. Don’t skip these referrals; early specialist care often prevents permanent damage.
Manage pain effectively
Proper pain control improves your quality of life and helps you follow cleaning and diet guidelines.
Medication guidelines
Use over-the-counter ibuprofen or acetaminophen as directed on the label. Ibuprofen is preferred for its anti-inflammatory effects. Never give aspirin or adult medications to children without medical advice [3]. If pain persists beyond a week or intensifies, schedule a follow up emergency dental visit.
Cold compress application
Apply a wrapped ice pack or cold compress to your cheek for 20 minutes on, 20 minutes off. This reduces swelling and numbs discomfort. Continue this routine for the first 48 hours, especially after any bleeding or bruising.
Avoid risky remedies
Home trends like clove oil or whiskey rinses can irritate delicate tissues. Stick to vetted solutions. For detailed protocols on medication and non-drug relief, see our guide on post procedure pain relief dentist.
Maintain oral hygiene
Cleanliness prevents infection and supports healthy tissue regrowth.
Gentle brushing
After the first 24 hours, brush with a soft-bristled toothbrush. Use very light pressure around injured areas to avoid dislodging clots or splints. If stitches are present, brush carefully along the gum line without disturbing them.
Rinse recommendations
Rinse with warm salt water—half a teaspoon of salt per eight ounces of water—two to three times daily. This soothes inflammation and washes away debris. Avoid vigorous swishing that could loosen healing clots. If prescribed a medicated mouthwash, follow your dentist’s timeline and dilution instructions [5].
Adjust your diet plan
Food choices have a direct impact on your recovery speed and comfort.
Soft diet essentials
During the first 48 hours, stick to a soft diet: yogurt, mashed potatoes, applesauce, smoothies and broths. These foods require minimal chewing yet provide nutrients. Cool or room-temperature options help prevent irritation.
Gradual food transition
As pain subsides, you can introduce more textured items like scrambled eggs, pasta, tender fish and steamed vegetables. Chew away from the injured side until full strength returns. Always cut food into small pieces to reduce strain on healing tissues.
Foods to avoid
- Hard nuts and seeds
- Crunchy chips or crackers
- Hot beverages and soups
- Acidic fruits like oranges and pineapples
- Sticky candies or caramels
These items risk dislodging clots, breaking temporary fillings or irritating exposed nerves.
Protect your healing tooth
Your mouth remains vulnerable until all tissues regain strength.
Avoid contact sports
Wait at least two weeks or until cleared by your dentist before resuming contact sports. Even mouth guards can put pressure on a splinted or fractured tooth. If you must play, use a custom-fitted guard and avoid any direct hits.
Use protective guards
For grinding or night clenching, ask about a soft night guard. Teeth that rub against each other can fracture more easily during healing. A guard distributes pressure and shields temporary restorations.
Monitor complications early
Catching issues promptly prevents minor setbacks from becoming major problems.
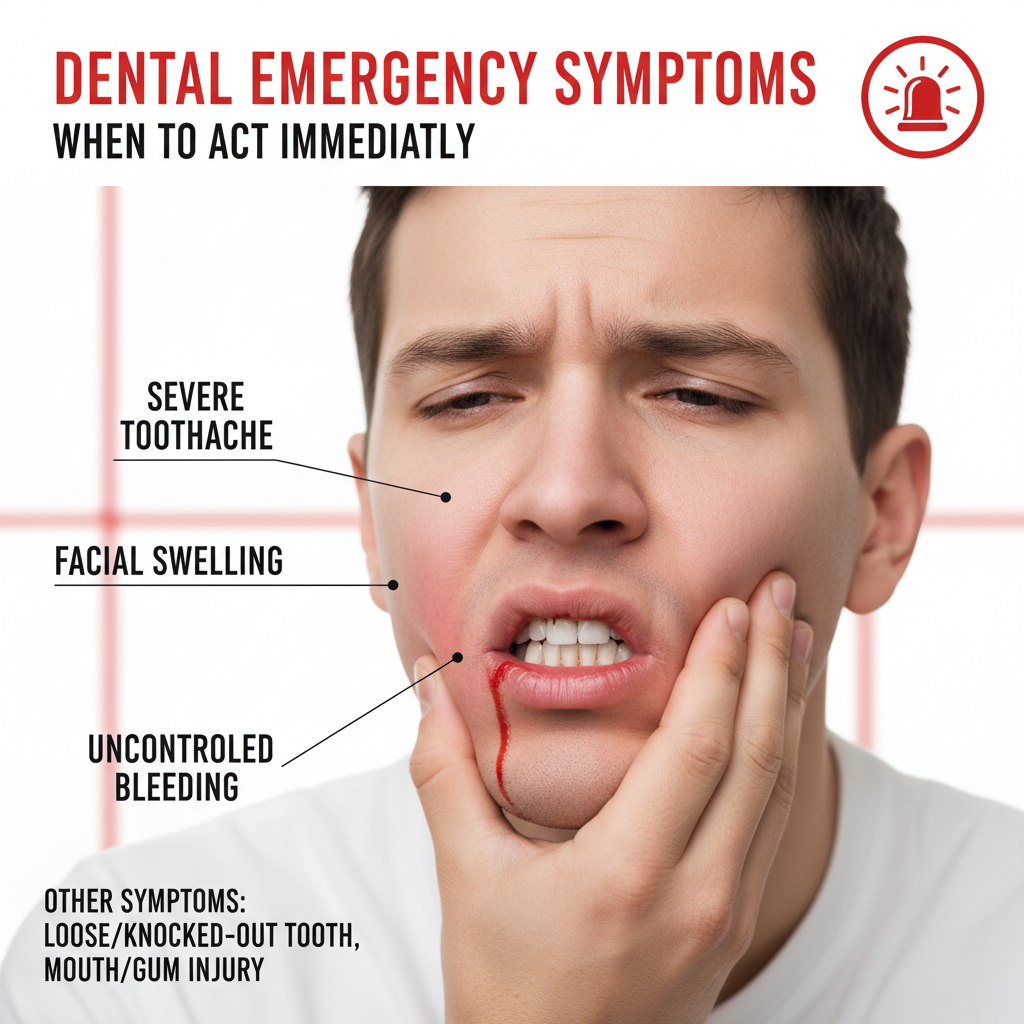
Signs to watch
- Persistent bleeding beyond 24 hours
- Severe or worsening pain despite medication
- Increased swelling or spreading redness
- Loose or shifting teeth after initial stabilization
- Fever or foul taste indicating infection
If you notice any of these signs, contact your dentist immediately rather than waiting for your next scheduled visit.
When to call
Persistent numbness, difficulty swallowing or breathing, and uncontrolled bleeding require same-day attention. Emergency clinics can address life-threatening complications, while routine follow-ups handle slower-developing concerns.
Plan long-term maintenance
Even after the immediate danger passes, maintain habits that protect your smile for years to come.
Restoration options
Once healing is complete, discuss permanent solutions. You may need crowns, bridges or implants to restore form and function. Early planning speeds up treatment and prevents bone loss.
Regular checkups
| Timeline | Action | Purpose |
|---|---|---|
| First 48 hr | Gentle cleaning, soft diet | Protect healing clots and reduce infection risk |
| 1 week | Splint removal or check-up | Evaluate stability and initial tissue repair |
| 2–4 weeks | X-ray assessment | Check bone healing and detect hidden fractures |
| 3–6 months | Restoration planning | Prepare for crowns, implants or bridges if needed |
| Annual | Routine dental exam | Prevent late complications and maintain oral health |
This timeline keeps you on track from acute recovery through full rehabilitation.
Healthy habits
Brush twice daily with fluoride toothpaste and floss gently once daily. Replace your toothbrush every three months or after any illness. Limit sugary snacks and acidic drinks to reduce cavity risk over weakened enamel.
Conclusion
Aftercare for dental trauma transforms emergency treatment into lasting oral health. By following first-aid steps, managing pain, protecting tissues and sticking to follow-up schedules, you safeguard your smile against infection, misalignment and tooth loss. If questions arise at any stage, reach out for guidance—your dentist is your partner in healing. Start today by scheduling your next emergency dental follow up appointment and keep your recovery on a steady path.